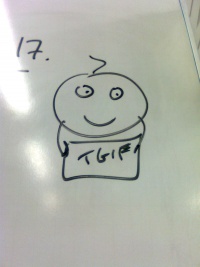
Infobox/Table based guide
| The Freitag Man |
|---|

|
| The Freitag Man -
The Freitag man is an example for this great infobox thingy |
| Where am I from?
Nobody knows! |
Welcome to this guide on the Table Based Infobox!!
Note:The Example below is based on the infobox on your right.
Contents
Code
Let's start by looking at the Infobox code...
{|border="1" cellspacing="0" cellpadding="2" tablewidth="200" align="right"
|-
!scope="col" bgcolor="blue" | <span style="color:white"> The Freitag Man </span>
|-
!scope="row"| [[File:Freitag_Man.jpg|200px|]]
|-
!scope="row"| The Freitag Man -
''The Freitag man is an example for this great infobox thingy''
|-
!scope="row"| Where am I from?
''Nobody knows!''
|}
Now that looks complicated! Lets break it down a little...
From [|border="1" to align="right"
Also known as... {|border="1" cellspacing="0" cellpadding="2" tablewidth="200" align="right" width="100"
The information in the above code controls the overall layout of the table.
border="1" is the table border. So, if you change to "1" to "0", the border disappears.
cellspacing="0" & cellpadding="2" are things you don't really want to mess with, however if you know wikicode (or html) you can if you so desire!
tablewidth="200" is the max width of your infobox. This is to make sure that the infobox doesn't extend across the entire page. You can change this to a smaller number for a smaller width, and a bigger number for a bigger width. If you put an image into the infobox, however, it overrides this setting.
align="right" is where the infobox is on the page. Normally, it's best to put the infobox on the right, but it can be put on the left if you want.
From |-
!scope="col" to </span>From |-
!scope="col" to </span>
Also known as
|- !scope="col" bgcolor="blue" | <span style="color:white"> The Freitag Man </span>
Again, this looks horrendously complicated but in reality it's fairly simple - it's the first section of the infobox!
When editing this infobox, don't touch anything that starts with !scope= (this is what holds the infobox together.)
bgcolor="blue" is the colour of the infobox part. You can add this code in other places (after !scope="row" and before the | after it) to change that part of the infobox. Obviously, "blue" is the colour that you want.
| is the divider between wikicode and text - again please don't touch!
<span style="color:white> sets the colour of the text right up until the </span> (in this case, after The Freitag Man). This can be set to any colour - again by changing the "white" bit.
The Freitag Man is the text. Edit this to whatever you like (teacher name, for example)
The Rest of It
If you look at the rest of the code, it is a repeat of itself. However, there are two crucial differences....
Image
This is the code for the section containing the image...
!scope="row"| [[File:Freitag_Man.jpg|200px|]]
As ever, don't touch the !scope bit.
Basically, the image works the same way as adding an image to a normal article. I'd keep the same size image (200px in this example) as the tablewidth earlier on.
Text
And so we're on to the two final sections...
!scope="row"| The Freitag Man - ''The Freitag man is an example for this great infobox thingy'' |- !scope="row"| Where am I from? ''Nobody knows!'' |}
These basically just contain the text of your choice. Note the '' that are on either side of "The Freitag Man..." - they make the text italic.
Notes
Please use the code here to create your infobox - the stuff here has been placed with special <nowiki> tags so that it doesn't apply the changes on this page.
To add more boxes, just copy the section...
!scope="row"| The Freitag Man - ''The Freitag man is an example for this great infobox thingy'' |-
below the final textbox bit, but before the |} at the end of the infobox.