Difference between revisions of "Wiki Images"
m (Unprotected "Wiki Images") |
(Made tutorial more indepth) |
||
| Line 5: | Line 5: | ||
name = Wiki Images| | name = Wiki Images| | ||
author = [[User:Alan|Alan]]| | author = [[User:Alan|Alan]]| | ||
| − | contributor = | + | contributor = [[User:Alan|Alan]], [[User:1885|1885]]| |
| − | description = How to use images in your wiki articles incase you didn't know already.| | + | description = How to use images in your wiki articles incase you didn't know already. Now includes some advanced techniques!| |
| − | date = April 15, 2010| | + | date = April 15, 2010, updated 26/10/10| |
}} | }} | ||
| − | + | __NOTOC__ | |
| − | + | ||
=Introduction= | =Introduction= | ||
Using images on your wiki article is very easy to do, this tutorial will show you how. | Using images on your wiki article is very easy to do, this tutorial will show you how. | ||
| − | =Syntax= | + | =Basic Syntax= |
You can create images like this, | You can create images like this, | ||
| Line 29: | Line 28: | ||
<nowiki>[[Image:Notepad-48.png]]</nowiki> | <nowiki>[[Image:Notepad-48.png]]</nowiki> | ||
| + | |||
| + | =Advanced Techniques= | ||
| + | |||
| + | ====Position==== | ||
| + | If you want to change the position of an image of an image, like this: | ||
| + | [[File:Notepad-48.png|centre]] | ||
| + | Then you could use something like this!: | ||
| + | <nowiki>[[File:Notepad-48.png|centre]]</nowiki> (change centre for left or right depending on what you want) | ||
| + | |||
| + | ====Size==== | ||
| + | If you want to change the size of an image: | ||
| + | |||
| + | [[File:Notepad-48.png|32px]] | ||
| + | |||
| + | Then try this: | ||
| + | |||
| + | <nowiki>[[File:Notepad-48.png|32px]]</nowiki> (32px is how large you want the image to be) | ||
| + | |||
| + | ====Caption==== | ||
| + | Want to add a cool caption to your image? (see right) | ||
| + | |||
| + | [[File:Notepad-48.png|thumb|A Really Cool Caption]] | ||
| + | |||
| + | Then use this syntax! | ||
| + | |||
| + | <nowiki>[[File:Notepad-48.png|thumb|A Really Cool Caption]]</nowiki> (by default, the ''thumb'' syntax aligns to the right - see below for the syntax to stop it!) | ||
| + | |||
| + | =Putting it All Together (Scenario)= | ||
| + | |||
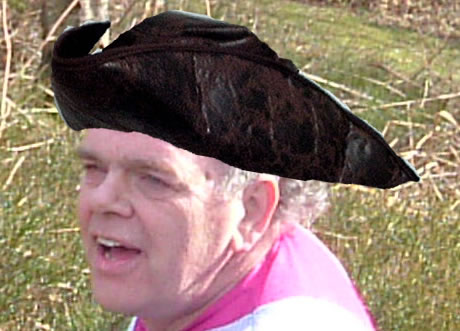
| + | So lets say that you had a "proper" image - like [[Media:Gray_pirate.jpg|Mr Gray in a pirate hat]] for example - that you wanted on the left hand side, 70px big, and a caption saying 'Pirate hat'... | ||
| + | |||
| + | [[File:Gray_pirate.jpg|thumb|left|70px|Pirate hat]] | ||
| + | |||
| + | |||
| + | ... then here is the code! | ||
| + | |||
| + | <nowiki>[[File:Gray_pirate.jpg|thumb|left|70px|Pirate hat]]</nowiki> | ||
| + | |||
=Notes= | =Notes= | ||
| Line 40: | Line 77: | ||
It can be done with this code: <nowiki>[[Media:Notepad-48.png]]</nowiki> | It can be done with this code: <nowiki>[[Media:Notepad-48.png]]</nowiki> | ||
| − | Linking to false pictures will create a red link that upon clicking will allow you to upload the picture, like this [[Image:Wow_Does_Not_Exist.fake]] | + | :Linking to false pictures will create a red link that upon clicking will allow you to upload the picture, like this [[Image:Wow_Does_Not_Exist.fake]] |
Latest revision as of 19:53, 26 October 2010
Error creating thumbnail: Unable to save thumbnail to destination |
Back to: Wiki Tutorials |
Error creating thumbnail: Unable to save thumbnail to destination Description: | How to use images in your wiki articles incase you didn't know already. Now includes some advanced techniques! |
Error creating thumbnail: Unable to save thumbnail to destination Original Author: | Alan |
| Error creating thumbnail: Unable to save thumbnail to destination Contributors: | Alan, 1885 |
| Error creating thumbnail: Unable to save thumbnail to destination Created: | April 15, 2010, updated 26/10/10 |
Introduction
Using images on your wiki article is very easy to do, this tutorial will show you how.
Basic Syntax
You can create images like this,
Using:
[[File:Notepad-48.png]]
You can also use:
[[Image:Notepad-48.png]]
Advanced Techniques
Position
If you want to change the position of an image of an image, like this:
Then you could use something like this!: [[File:Notepad-48.png|centre]] (change centre for left or right depending on what you want)
Size
If you want to change the size of an image:
![]()
Then try this:
[[File:Notepad-48.png|32px]] (32px is how large you want the image to be)
Caption
Want to add a cool caption to your image? (see right)
Then use this syntax!
[[File:Notepad-48.png|thumb|A Really Cool Caption]] (by default, the thumb syntax aligns to the right - see below for the syntax to stop it!)
Putting it All Together (Scenario)
So lets say that you had a "proper" image - like Mr Gray in a pirate hat for example - that you wanted on the left hand side, 70px big, and a caption saying 'Pirate hat'...

... then here is the code!
[[File:Gray_pirate.jpg|thumb|left|70px|Pirate hat]]
Notes
In some cases, you may want to link to a picture.
The result will give a full url like this:
It can be done with this code: [[Media:Notepad-48.png]]
- Linking to false pictures will create a red link that upon clicking will allow you to upload the picture, like this File:Wow Does Not Exist.fake